To use a wall stud finder, calibrate it, scan slowly, mark the edges, and confirm the stud before drilling.
Learning how to use a wall stud finder can save time, prevent crooked shelves, and help you avoid costly damage. Whether you are hanging a TV, mounting cabinets, or installing a picture frame, the right scanning method matters more than the tool’s price. This guide explains the process clearly, including calibration, wall types, common mistakes, and safe ways to confirm your results.

What Is a Wall Stud Finder?
A wall stud finder is a handheld tool that helps locate studs behind drywall, plaster, or other wall coverings. A stud is a vertical framing member, often made of wood or metal, that supports the wall.
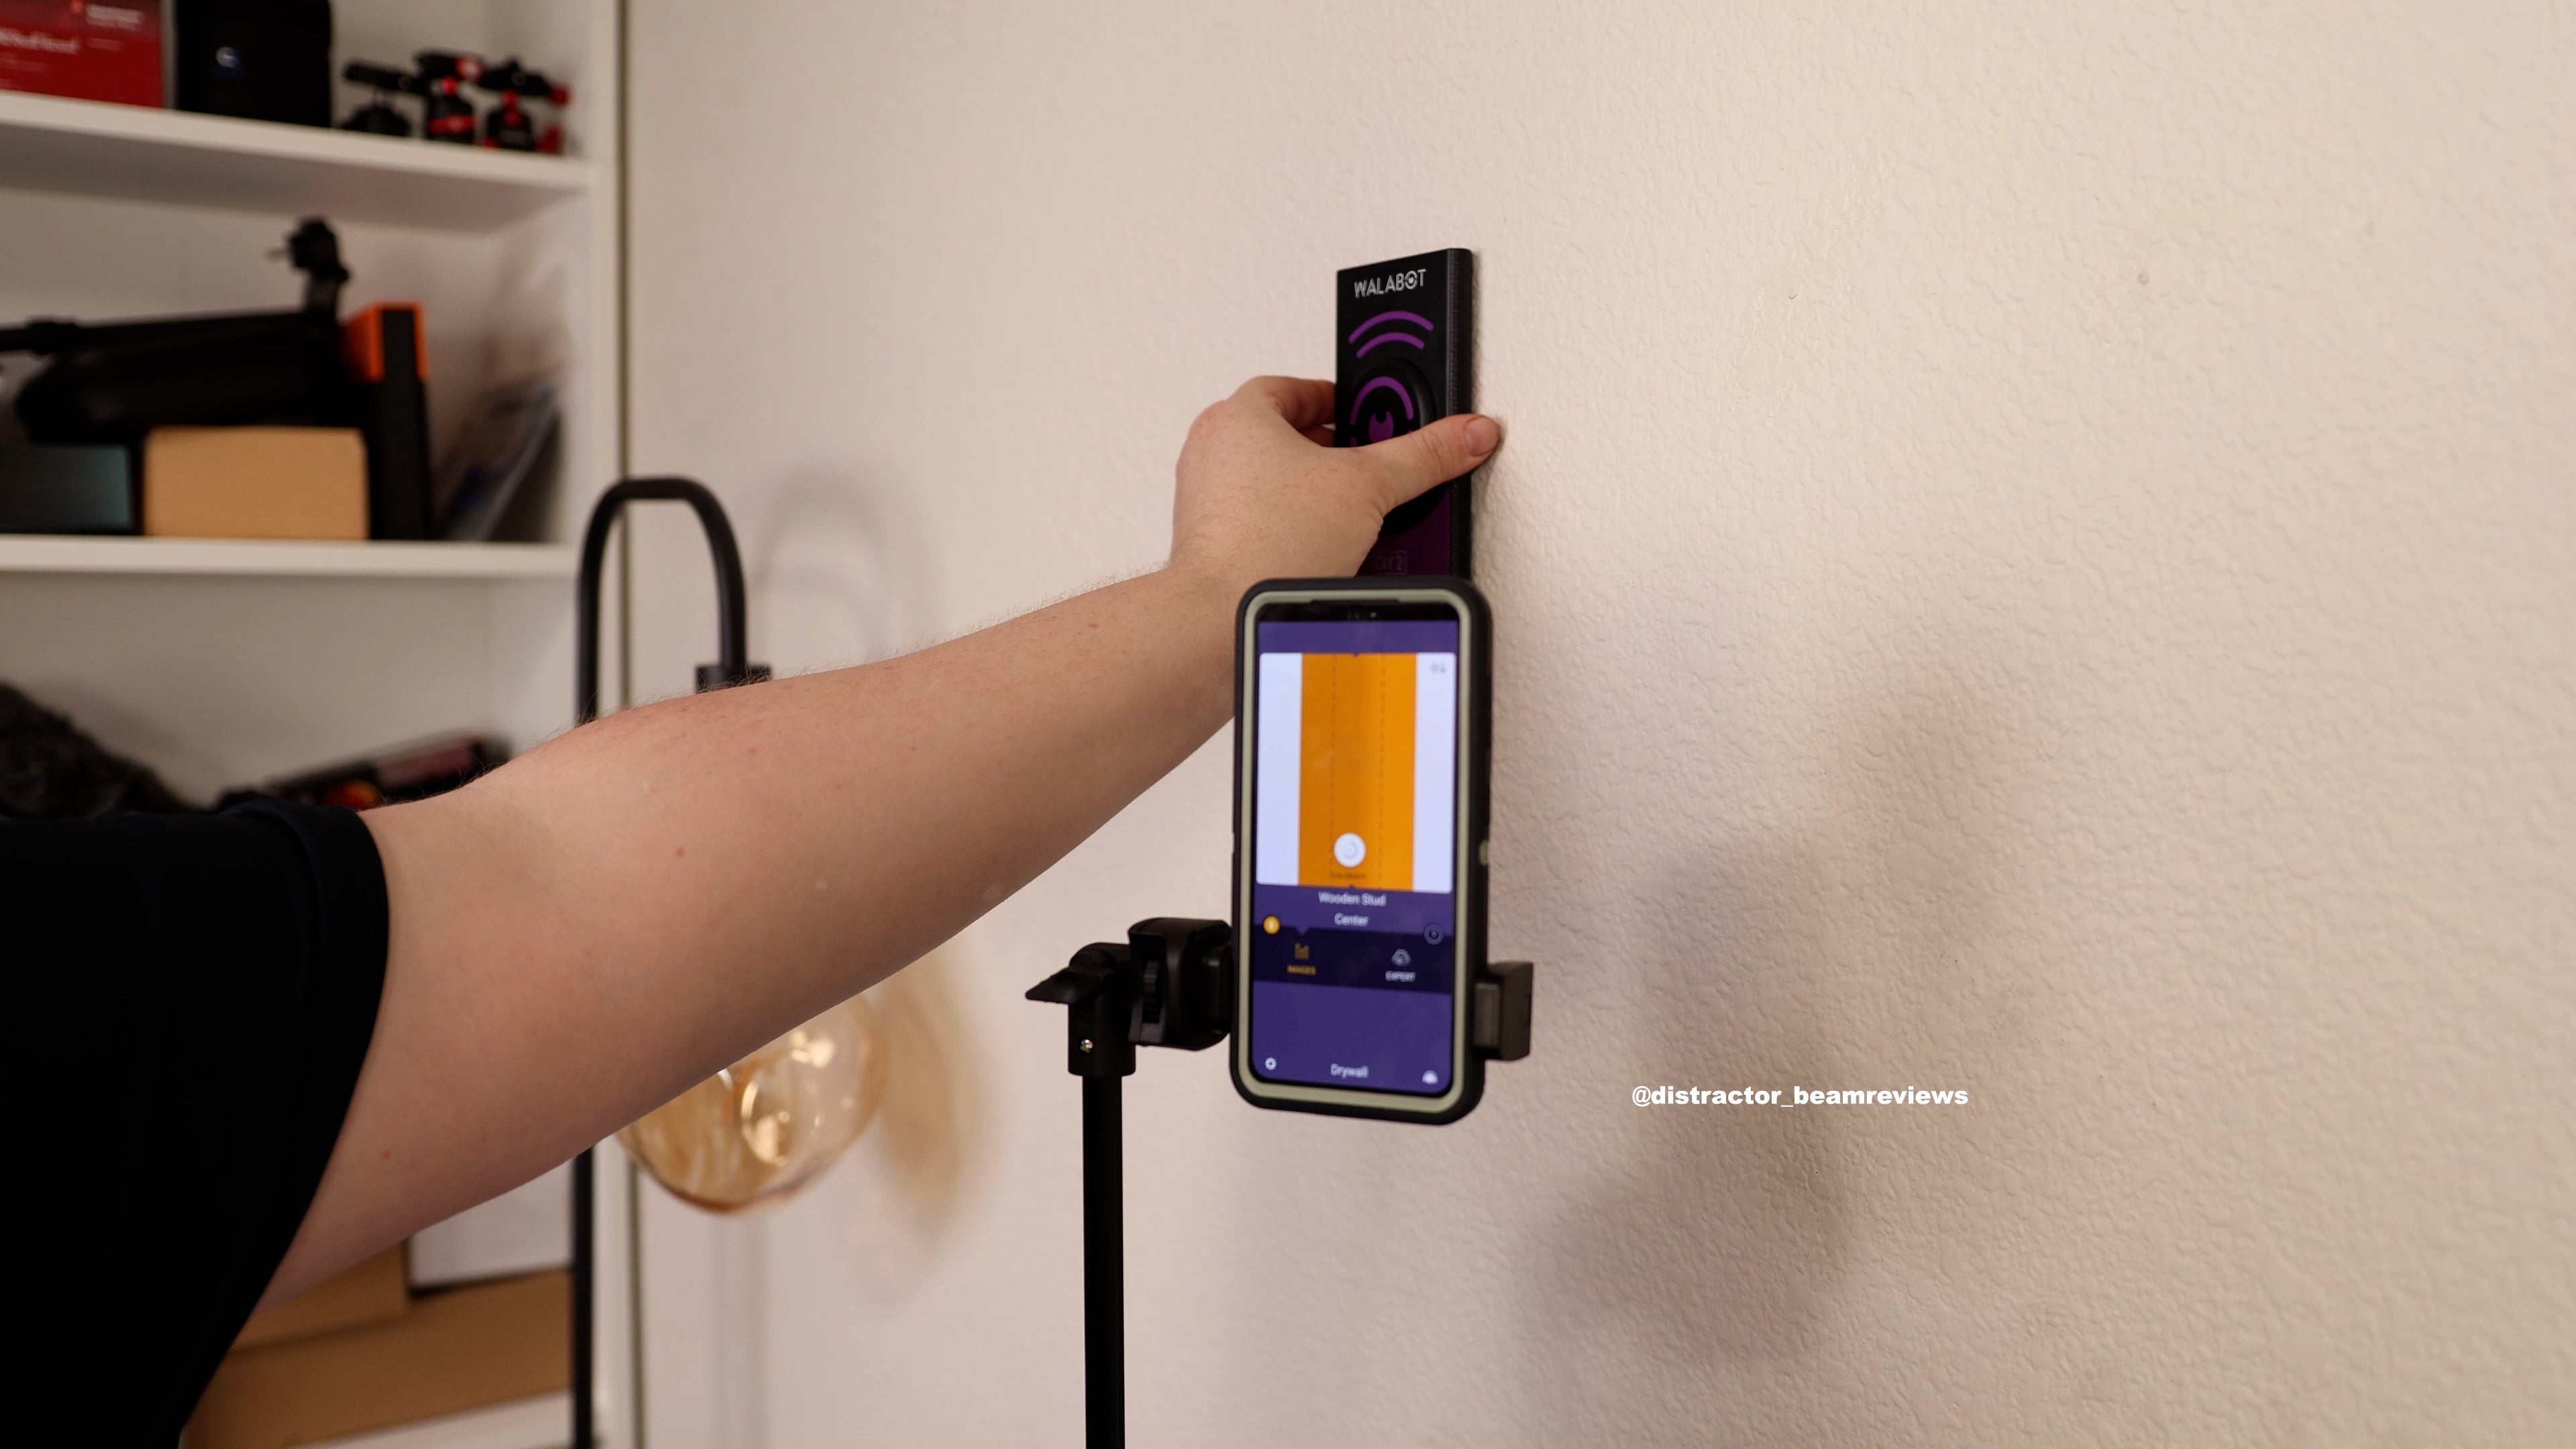
Most modern stud finders use sensors to detect changes in wall density. Some models sense the edges of a stud, while others identify the center. Advanced tools may also detect live electrical wires or metal objects.
The main types include:
• Magnetic stud finders detect screws or nails attached to a stud.
• Electronic stud finders sense changes in wall density.
• Deep-scanning models search through thicker surfaces.
• AC detection models warn you about nearby live wires.
A stud finder does not “see” the wall like an X-ray. It reads changes behind the surface. This means dust, thick paint, tile, plaster, insulation, and pipes can affect the result.
How to Prepare Before Using a Wall Stud Finder
Good results start before you turn the tool on. Clear the wall area and remove nearby objects that may affect the scan.
Follow these simple steps:
-
Remove pictures, hooks, shelves, and loose items from the wall.
-
Clean dust and dirt from the scanning area.
-
Check the tool’s batteries and replace weak batteries.
-
Read the tool’s instructions, since each model works in a slightly different way.
-
Choose a smooth, flat starting point on the wall.
-
Keep your other hand away from the scan area when using an electronic model.
A common mistake is starting directly over a corner, outlet, switch, or thick patch of joint compound. These areas may change the sensor reading. Start in a clear section of wall instead.
When I use a wall stud finder, I also keep a pencil, tape measure, and small level nearby. Finding the stud is only the first step. You still need to mark its center and plan the mounting height.
How to Use a Wall Stud Finder Step by Step
The basic process is simple, but slow movements produce better results. Rushing can make the tool miss the stud or give a false reading.
1. Turn on the tool
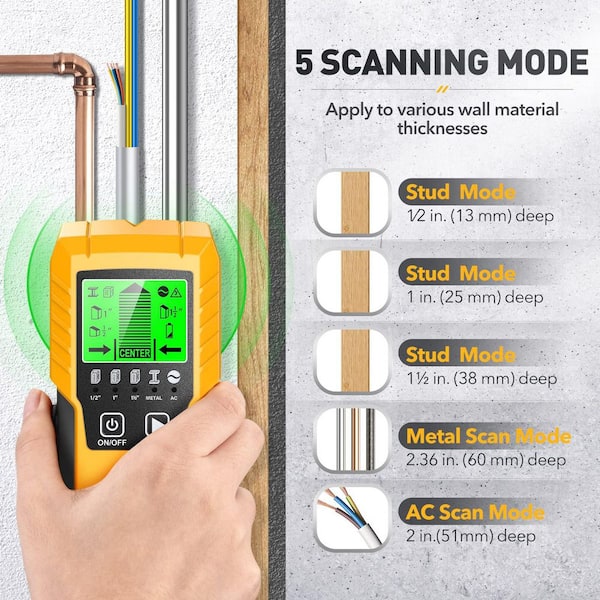
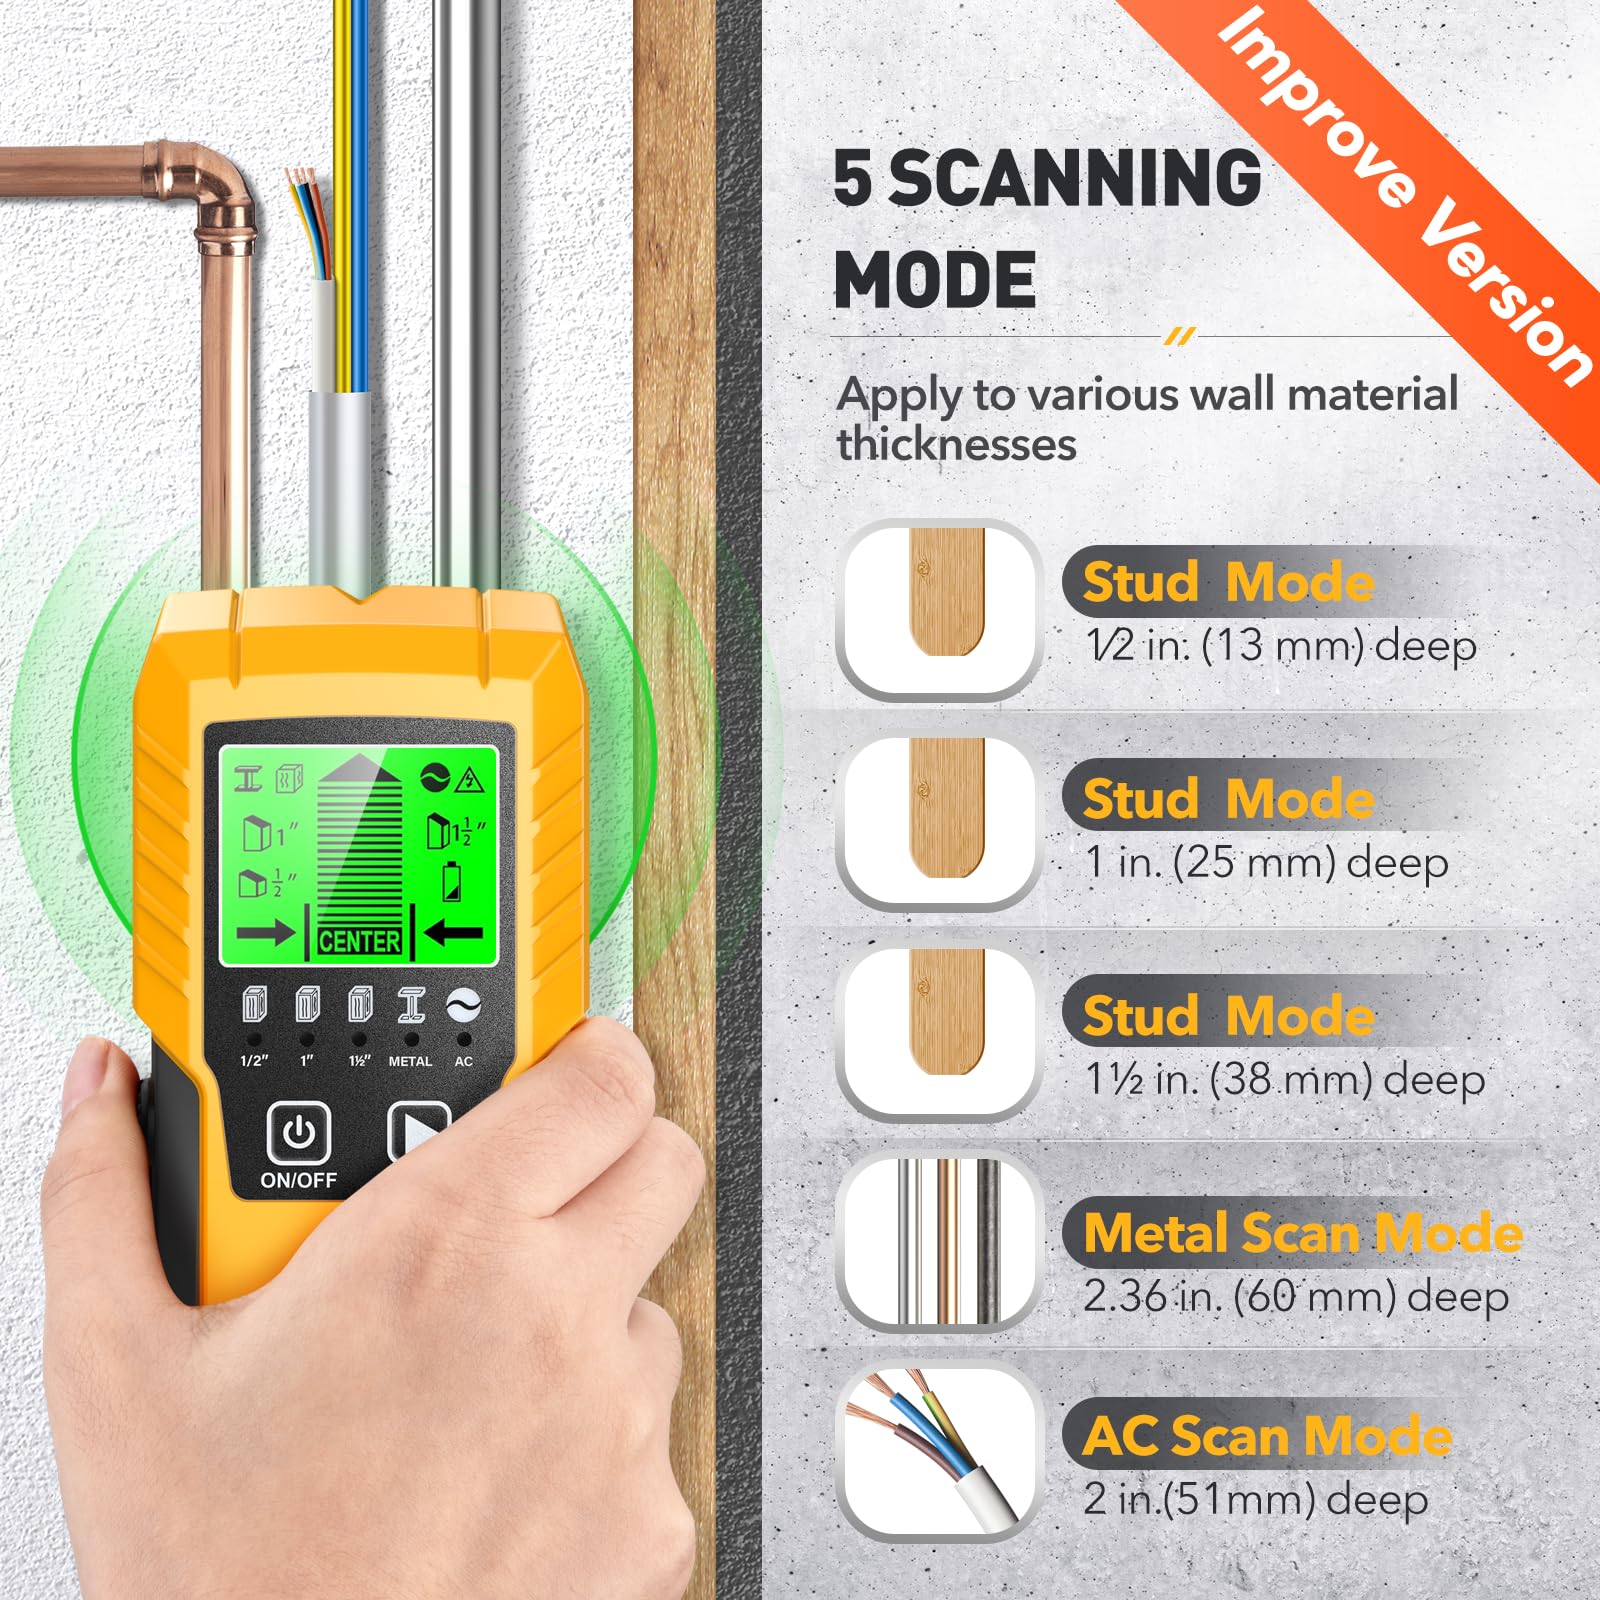
Switch on the wall stud finder and select the correct mode. Many devices have settings for wood studs, metal studs, deep scanning, or live-wire detection.
If the tool has only one mode, use the standard scan setting first. Change modes only when the wall is thick or the first scan is unclear.
2. Calibrate the stud finder
Place the tool flat against the wall in a clear area. Press the calibration button or follow the start-up instructions.
Calibration teaches the tool what the wall surface normally looks like. If you calibrate over a stud, an outlet, or a dense repair patch, the tool may produce an incorrect result.
Some models calibrate automatically when you turn them on. Keep the device still until the display or light shows that calibration is complete.
3. Move the tool slowly
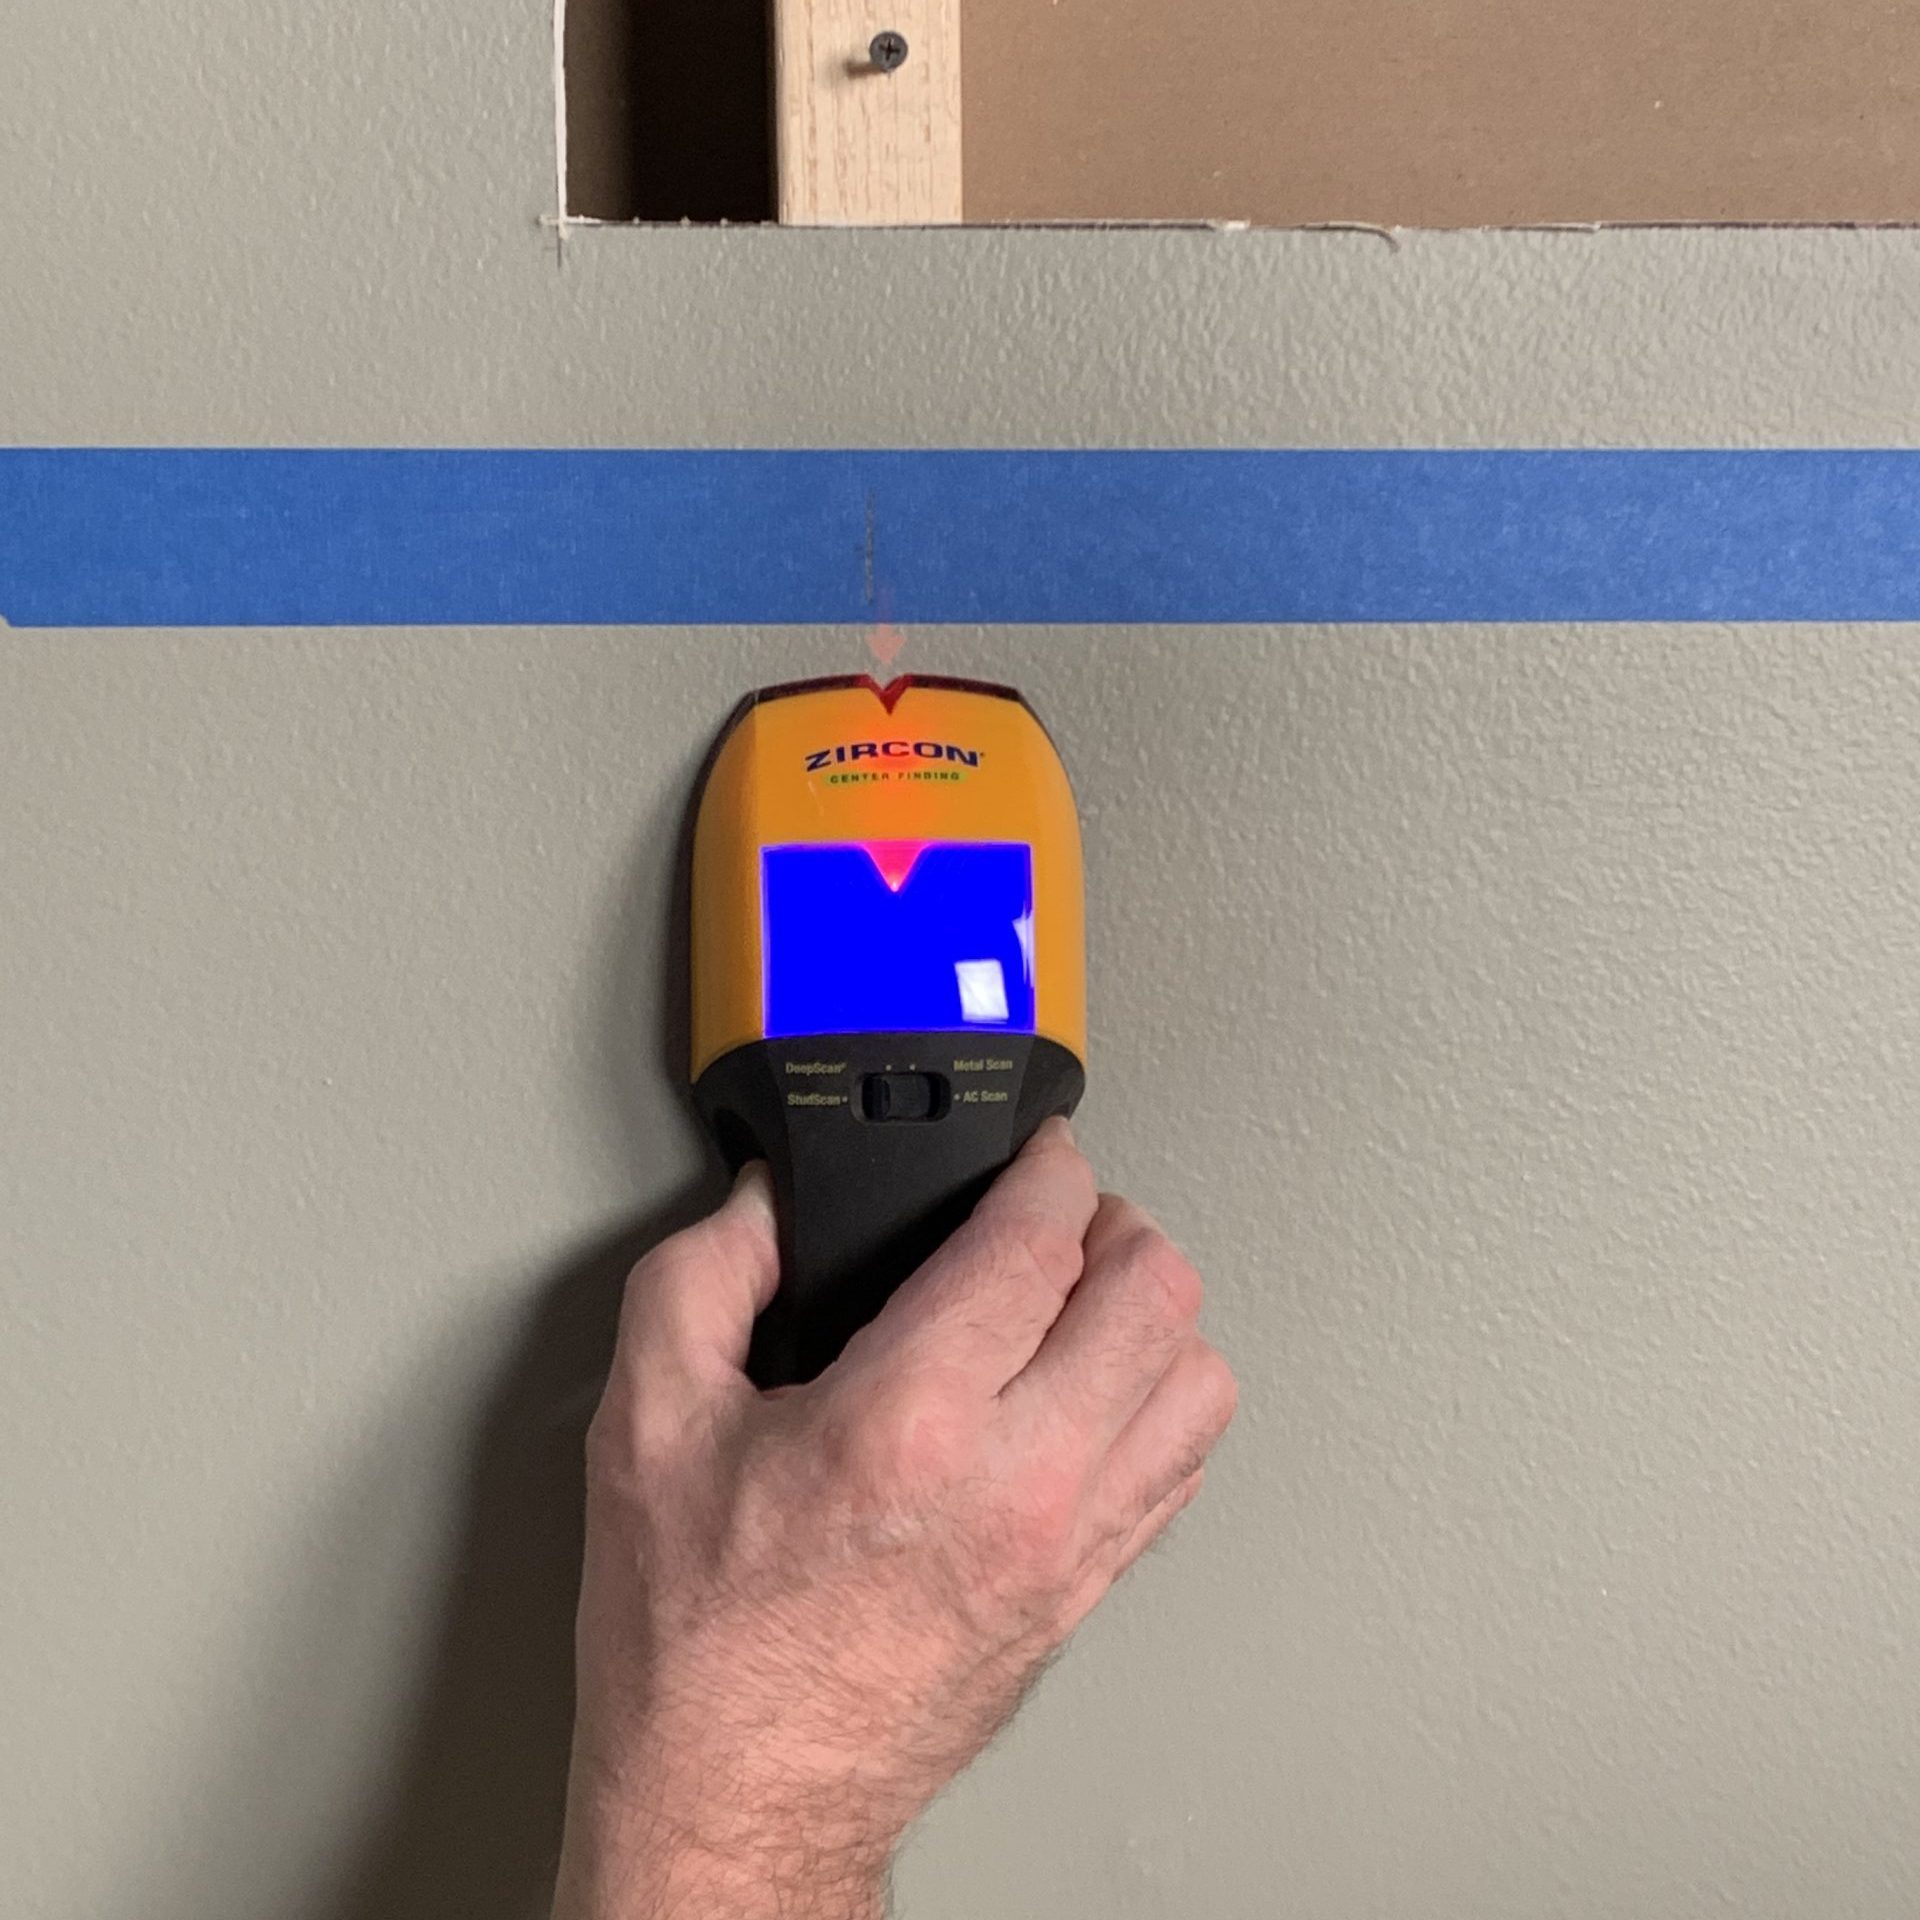
Place the wall stud finder flat against the wall. Move it in a straight horizontal line at a slow, steady speed.
Do not tilt the tool. Do not lift one edge away from the wall. A gap between the tool and the surface can change the reading.
Most tools beep, light up, or show bars as you approach a stud. Treat this signal as a clue, not final proof.
4. Mark the first edge
When the tool signals the beginning of a stud, stop. Use a pencil to mark that point lightly.
Continue moving in the same direction until the signal fades. Mark that location too. You now have the approximate left and right edges of the stud.
5. Find the center
Measure the distance between the two edge marks. The center of that space is usually the stud center.
Some wall stud finders show the center automatically. Even then, it is wise to scan from the opposite direction and compare the result.
6. Scan again from the other direction
Start several inches away and move back across the same area. Mark the edges again.
If both scans produce similar marks, your result is more reliable. If the marks differ widely, recalibrate and try again.
7. Confirm the location
Use a small finishing nail or a very thin drill bit in an inconspicuous place. Make a shallow test hole where you believe the stud center is located.
Wood usually offers firm resistance after the drywall layer. An empty cavity feels easier to penetrate. Stop if you meet unusual resistance or suspect metal, plumbing, or wiring.
Never use a test hole as an excuse to drill deeply. The goal is only to confirm the framing location.
How to Find the Center of a Stud Accurately
Many beginners stop at the first beep. That mark may show the edge of the stud, not its center.
Electronic stud finders often detect the change in density as the sensor moves onto the stud. The signal may grow stronger near the center and weaken as the tool moves off it.
To find the center:
• Scan from left to right and mark both edges.
• Scan from right to left and mark both edges.
• Compare the four marks.
• Use the midpoint of the most consistent marks.
• Make a small vertical line at the center.
For standard wood framing, studs are commonly spaced 16 inches on center. Some walls use 24-inch spacing, and older homes may have irregular layouts. Use spacing as a helpful clue, not as proof.
A wall stud finder can be wrong when the wall has thick plaster, multiple layers of drywall, heavy texture, or hidden blocking. Confirm important locations before installing a heavy object.
How to Use a Wall Stud Finder on Different Walls
Drywall
Drywall is usually the easiest surface for a wall stud finder. Use the standard setting, keep the device flat, and scan slowly.
Avoid scanning directly over thick seams or repaired holes. Joint compound can create a density change that confuses the sensor.
Plaster walls
Plaster walls can be harder to scan because they are denser and may contain wood lath or metal mesh. Use a deep-scan mode if available.
Scan several times and confirm the result with a small test hole. In older homes, framing may not follow modern 16-inch spacing.
Tiled walls
Tile, backer board, and adhesive can block or distort electronic signals. A deep-scan tool may help, but results can still be uncertain.
Do not drill into tile until you have checked for plumbing and electrical hazards. Use a tile-rated bit and start slowly if drilling is necessary.
Textured walls
Heavy texture can create a gap between the sensor and the wall. Press the tool gently and evenly against the surface.
If the texture is very rough, place a thin piece of cardboard over the area and calibrate the tool with the cardboard in place. Check your tool manual first, since not every model supports this method.
Metal studs
Metal studs are common in some offices, apartments, and newer construction. A magnetic model may detect them, while an electronic model may show a wide or unusual signal.
Metal framing may not support the same load as solid wood framing. Use fasteners designed for metal studs, or locate additional blocking before mounting heavy items.

How to Use a Wall Stud Finder Safely
Finding a stud does not guarantee that the area is safe to drill. Walls can contain electrical cables, water pipes, gas lines, and data wires.
Use these safety steps:
• Look for outlets and switches. Wiring often runs vertically or horizontally near them.
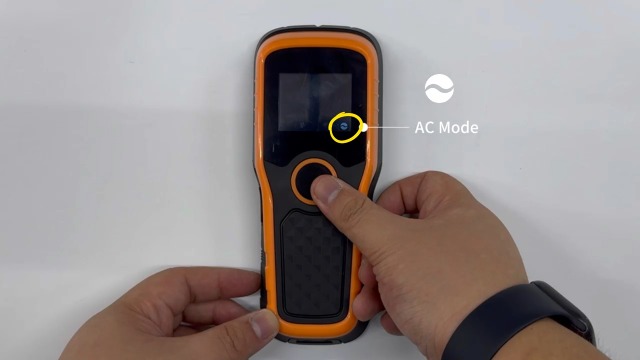
• Use the AC detection mode if your tool includes one.
• Turn off power at the breaker before drilling near electrical devices.
• Avoid drilling directly above or below plumbing fixtures.
• Keep holes shallow until you understand what is behind the wall.
• Use a depth stop when drilling into an unknown area.
• Wear eye protection when drilling overhead.
Electrical detection is helpful but not perfect. A wire may be shielded, disconnected, too deep, or outside the sensor’s range. Never treat a stud finder’s “clear” reading as a guarantee that no wire or pipe is present.
Building codes often require protective metal plates over wiring and plumbing that passes too close to the wall surface. However, not every hazard is protected or easy to detect. When in doubt, stop and ask a qualified electrician or plumber.

Common Mistakes When Using a Wall Stud Finder
Even a good tool can give poor results when used incorrectly. These mistakes are especially common.
Calibrating over a stud
The tool needs a normal wall reading. If you calibrate over dense framing, the sensor may fail to recognize the stud.
Move to a clear area and recalibrate.
Moving too fast
Fast scanning can cause the device to skip the first edge or miss a narrow signal. Move at the speed recommended in the manual, or slower.
Tilting the tool
A tilted sensor may read the wall unevenly. Keep the entire base flat against the surface.
Trusting one scan
One scan is not enough for a heavy shelf or TV mount. Scan in both directions and check the expected spacing.
Marking only one point
The first beep may indicate an edge. Mark both edges, then find the midpoint.
Ignoring wall materials
Plaster, tile, thick paint, and textured surfaces can distort readings. Use the correct scan mode and confirm uncertain results.
Drilling too deeply
A long bit can reach a wire or pipe even when the stud location is correct. Start with a shallow hole and use the proper screw length.
In my own projects, the most frustrating errors came from trusting the first beep. A second pass from the opposite direction often moved the center mark by a quarter inch or more. That small difference matters when a bracket has narrow mounting slots.

How to Confirm a Stud Without Causing Damage
If the project is light, you may not need to make a test hole. For heavier items, confirmation is wise.
Try these methods:
• Scan from both directions.
• Check for a vertical line of nearby outlets or switches.
• Look for consistent stud spacing.
• Use a magnetic finder to locate drywall screws.
• Make a tiny test hole in a hidden location.
• Inspect the drill debris.
A magnetic stud finder is useful because drywall screws are usually attached to the stud. Move the magnet slowly across the wall until it sticks. Several screws in a straight vertical line can reveal the stud’s position.
This method may not work on walls with metal framing, unusual fasteners, thick plaster, or extensive wall repairs. Use more than one clue when accuracy matters.
Choosing the Right Fastener After Finding the Stud
The correct fastener depends on the wall material, stud type, and object weight.
For wood studs, use a wood screw that enters the stud by about 1 to 1½ inches after passing through the bracket and drywall. Avoid using a screw so long that it may reach hidden wiring or plumbing.
For metal studs, use fasteners made for metal framing. Heavy objects may need toggle bolts, a mounting board, or additional blocking.
For drywall without a stud, choose an anchor rated for the actual load. Read the package rating and remember that ratings often assume ideal installation.
A TV, floating shelf, cabinet, or large mirror should not rely on a small drywall anchor alone unless the anchor and wall system are designed for that weight. When possible, attach the mounting hardware to solid framing.
Tips for Better Results
These practical tips can make how to use a wall stud finder easier and more accurate:
• Use fresh batteries.
• Keep the tool clean.
• Hold it in the same position during calibration and scanning.
• Make light pencil marks that can be erased.
• Scan above and below the planned mounting point.
• Confirm the center before drilling.
• Use a level after marking the stud.
• Check the user manual for calibration and signal meanings.
• Test the tool on a known stud if possible.
• Use a second detection method for expensive or heavy installations.
If the reading seems strange, do not force the result. Recalibrate, change direction, and scan a nearby area. A few extra minutes can prevent a damaged wall or a dangerous drill location.
Frequently Asked Questions About How to Use a Wall Stud Finder
How do you use a wall stud finder correctly?
Place the tool flat against the wall, calibrate it in a clear area, and move it slowly across the surface. Mark both edges of the signal, then use the midpoint as the likely stud center.
Why is my wall stud finder giving false readings?
False readings can come from weak batteries, thick plaster, textured walls, wall seams, metal mesh, or incorrect calibration. Recalibrate on a clear area and scan from the opposite direction.
How far apart are wall studs?
Many modern homes use studs spaced 16 inches on center. Some walls use 24-inch spacing, while older buildings may have irregular spacing.
Can a wall stud finder detect wires?
Some electronic models can detect live AC wiring, but the feature is not perfect. Treat the warning as important, but never assume a clear reading guarantees that the wall is free of wires.
How do you find the center of a stud?
Scan across the wall and mark both edges of the signal. The center is halfway between those marks, and a second scan from the opposite direction can improve accuracy.
Can you use a stud finder on a plaster wall?
Yes, but plaster can make scanning less reliable because it is dense and may contain lath or metal mesh. Use a deep-scan setting and confirm the location with another method.
Do stud finders work through tile?
Some deep-scanning tools may work through tile, but readings can be inconsistent. Check for wiring and plumbing before drilling, and use a suitable bit and safe drilling depth.
[CodeImg? Wait user says no CodeImg after FAQ. I accidentally placeholder? Need remove. Continue conclusion.]