Choose a rain shower head by matching its size, spray pattern, water pressure, ceiling height, finish, and installation needs.
Learning how to choose a rain shower head is easier when you treat it like planning a small spa, not just buying a round fixture. The right model should feel gentle yet steady, fit your space, use water wisely, and work with your plumbing. This guide explains the key details, common mistakes, and practical checks that help you buy with confidence.

What Is a Rain Shower Head?
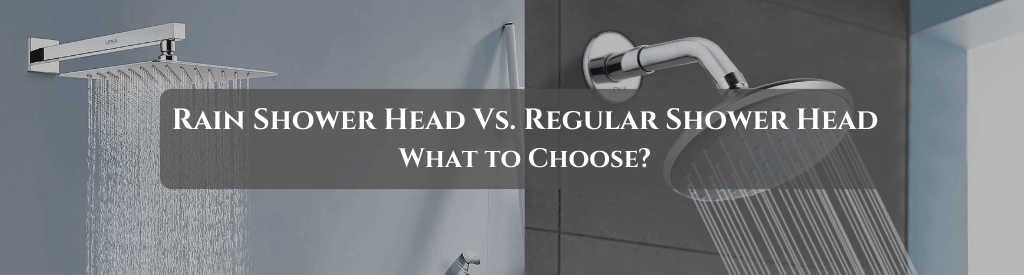
A rain shower head is a wide shower fixture designed to send water down from above. Its spray feels more like soft rainfall than a strong jet from a standard wall-mounted shower head.
Most rain shower heads are installed on the ceiling or on a wall arm that points downward. They come in round, square, and rectangular shapes. Common sizes range from 6 to 16 inches, although larger models are also available.
A rain shower head can create a calm, spa-like feel. However, a larger face does not always mean better performance. Water pressure, nozzle design, pipe size, and installation height all affect the experience.
How to Choose a Rain Shower Head: Start With Your Bathroom
Before comparing styles, measure your shower area. A beautiful fixture can feel awkward if it is too large for the enclosure or mounted in the wrong place.
Use these checks first:
• Measure the shower width and length.
• Note the location of the existing shower arm.
• Check the ceiling height or wall height.
• Look for doors, shelves, lights, and other fixtures.
• Confirm whether your plumbing supports a ceiling connection.
For most standard showers, an 8 to 12-inch rain shower head offers a good balance. A 16-inch model may feel luxurious, but it needs enough water flow to cover the full surface.
If your shower is narrow, choose a smaller head. Water should fall inside the shower area, not splash onto the floor. This simple measurement is one of the most important parts of how to choose a rain shower head.

Choose the Right Shower Head Size
Size affects coverage, water use, appearance, and pressure. It is one of the first features shoppers notice, but it should not be the only one.
Small rain shower heads
Models from 6 to 8 inches work well in compact showers. They usually need less water to wet the entire spray plate and may perform better in homes with low pressure.
Small heads are also easier to install. They place less weight and stress on the shower arm, especially when attached to older plumbing.
Medium rain shower heads
Models from 8 to 12 inches suit many homes. They offer broad coverage without demanding as much water as very large designs.
For most buyers, this is the safest size range. It provides a rain-like spray while remaining practical for daily use.
Large rain shower heads
Models from 14 inches and above create wide coverage. They can look impressive in a large walk-in shower.
The limitation is water demand. A large shower head may feel weak if your home has low flow or a restrictive valve. Always check the listed gallons per minute before buying.
A common mistake I have seen is choosing the largest fixture because it looks more luxurious in a product photo. In real bathrooms, the best size is the one that matches both the shower space and the plumbing.

Check Water Pressure and Flow Rate
Water pressure is central to how to choose a rain shower head. A rain shower does not usually feel like a narrow, high-pressure jet. It spreads water over a wider area, so the spray may feel softer.
Check your home’s water pressure if possible. A plumber can test it with a pressure gauge attached to an outdoor spigot or another suitable connection. Many homes work well around 40 to 60 pounds per square inch, but local plumbing conditions can vary.
Also check the flow rate. In the United States, shower heads commonly have a maximum flow rate of 2.5 gallons per minute. WaterSense-labeled models use no more than 2.0 gallons per minute while meeting performance requirements for spray force and coverage.
Look for these details on the product page:
• Gallons per minute, or GPM
• Minimum recommended pressure
• Maximum operating pressure
• WaterSense certification, when available
• Whether the flow rate changes between spray settings
A low-flow rain shower head can reduce water use, but it may not fix poor pressure caused by blocked pipes, a partly closed valve, or an old cartridge. Do not blame the shower head until the plumbing has been checked.

Pick a Spray Pattern That Fits Your Routine
Rain shower heads often have one main spray pattern, but some models offer several settings. Your daily habits should guide your choice.
A wide rainfall spray is ideal for relaxed showers. It spreads water gently and covers the body with less need to move around.
A concentrated spray can help rinse shampoo or thick hair. It may also feel stronger than a soft rainfall setting.
Massage jets provide a focused stream for the shoulders and back. They are useful after exercise, but they are not always included in a true rain shower head.
A dual shower system combines a rain shower head with a handheld wand. This is often the most flexible setup. You can enjoy the overhead spray while using the wand to rinse children, pets, mobility aids, or hard-to-reach areas.
If you are unsure how to choose a rain shower head, think about function first. A simple model may be best for relaxation, while a combination system works better for a busy family bathroom.
Decide Between Ceiling-Mount and Wall-Mount Installation
Installation position changes the way the water falls.
Ceiling-mounted rain shower head
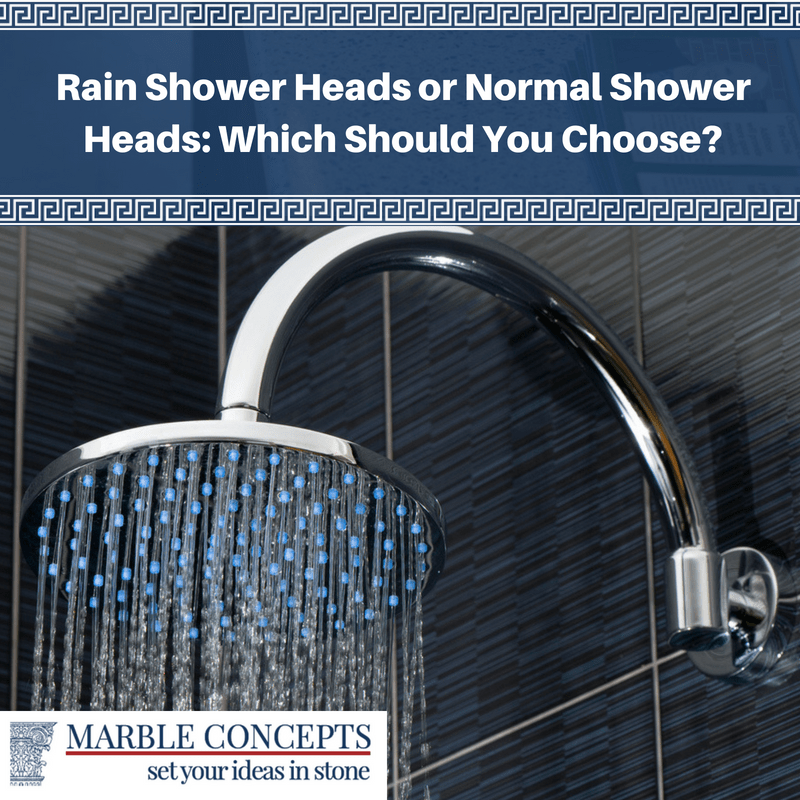
A ceiling mount places the fixture directly above you. This creates the most natural rainfall effect and can provide even coverage.
It may require new plumbing in the ceiling. That can increase labor, especially in a finished bathroom or on an upper floor.
Wall-mounted rain shower head
A wall-mounted model attaches to a shower arm that extends outward and angles down. It is often easier and less expensive to install because it can use the existing shower connection.
The spray may fall at a slight angle rather than straight down. Proper positioning is important to keep water inside the shower.
Adjustable shower arm
An adjustable arm can help you change the height and angle. It is useful when several people share one bathroom or when the existing connection is not in an ideal location.
Before installation, confirm that the wall or ceiling connection can support the fixture. Large metal heads can be heavy, especially when filled with water.

Consider the Height and Shower Layout
A rain shower head needs enough space above your head for the spray to spread. It should not sit so low that the water hits your face with force or feels cramped.
A typical wall-mounted shower head is often placed around 80 inches above the finished floor, but the correct height depends on the users and the fixture. Taller people may need a higher position. A ceiling-mounted head can sit higher if the ceiling allows it.
Keep these points in mind:
• Place the head near the center of the shower area.
• Keep the spray away from the door opening.
• Leave room for taller users.
• Check that the spray does not hit shelves or grab bars.
• Make sure the shower arm can handle the head’s weight.
A good layout feels natural without requiring you to stand in one exact spot. Think of the water pattern as a soft umbrella. It should cover you without spilling beyond the shower zone.

Choose a Durable Material and Finish
The material affects weight, durability, cleaning, and price.
Stainless steel is strong and resists corrosion. It is a good choice for humid bathrooms and often has a clean, modern appearance.
Brass is durable and commonly used in quality shower components. It may cost more, but it can provide a solid feel and long service life.
Plastic or ABS models are light and affordable. They can work well, especially when the internal parts are reliable. However, low-cost plastic may discolor, crack, or feel less stable over time.
Popular finishes include:
• Chrome
• Brushed nickel
• Matte black
• Polished nickel
• Oil-rubbed bronze
• Brushed brass
Match the finish with your faucet, drain, cabinet hardware, and towel bars. Finish names are not always identical between brands, so compare samples when possible.
In my experience reviewing bathroom fixtures, the easiest finishes to maintain are often brushed or lightly textured ones. Highly polished surfaces can show water spots more clearly, especially in areas with hard water.
Look for Easy-Clean Nozzles
Mineral buildup can reduce spray quality. This is common in areas with hard water.
Many rain shower heads use silicone nozzles. You can wipe these nozzles with a finger or soft cloth to loosen mineral deposits. This design is more convenient than small metal openings that are difficult to clean.
Avoid using sharp tools to clear the nozzles. They can damage the spray outlets and create an uneven pattern.
For routine care:
• Wipe the nozzles once a week.
• Clean the surface with mild soap and water.
• Dry the fixture if water spots are a concern.
• Use vinegar only when the manufacturer allows it.
• Do not mix cleaning products.
If buildup is severe, remove the shower head only if the instructions permit it. Soaking the entire fixture in a strong solution can damage seals, coatings, or internal parts.
Compare Features Without Paying for Gimmicks
Extra features can be useful, but they can also add cost and maintenance.
A handheld shower wand is one of the most practical additions. It improves rinsing and helps users with limited mobility.
A thermostatic valve can keep the water temperature more stable. This is different from the shower head itself, but it may improve the entire shower system.
A pause button can reduce water flow while you lather. It may not stop the water completely, depending on the design.
LED lights are usually powered by the water flow or small generators. They can look attractive, but they do not improve cleaning or comfort. Choose them only if you value the design and understand that more parts may mean more maintenance.
Avoid paying extra for claims that are hard to verify. Strong performance usually depends more on nozzle layout, pressure, flow control, and proper installation than on decorative features.
Check Standards, Warranty, and Product Details
Reliable product information helps you avoid surprises. Read the technical specifications instead of relying only on photos.
Look for:
• Flow rate in GPM
• Connection size, often 1/2 inch in the United States
• Product dimensions
• Fixture weight
• Required shower arm type
• Included seals and hardware
• Warranty length
• Replacement part availability
A shower head sold in the United States should comply with applicable plumbing and flow regulations. ASME A112.18.1 and CSA B125.1 are widely used standards for plumbing supply fittings. WaterSense certification is another useful sign when water efficiency matters.
A warranty does not guarantee perfect performance, but it shows that the manufacturer stands behind the product. Keep your receipt and installation instructions in case you need replacement parts.
Understand the Installation Requirements
Some rain shower heads are simple replacements. Others require a complete plumbing project.
A basic wall-mounted replacement may involve:
-
Removing the old shower head.
-
Cleaning the shower arm threads.
-
Applying approved thread seal tape as directed.
-
Installing the new fixture by hand.
-
Tightening it gently with a protected wrench if needed.
-
Checking for leaks.
Do not overtighten the fixture. Excess force can damage threads, crack a fitting, or twist the pipe inside the wall.
Ceiling-mounted installation is more complex. It may require new supply lines, a supported drop-ear elbow, ceiling access, waterproofing, and professional inspection. If the connection is inside a finished wall or ceiling, hiring a licensed plumber is often the safer choice.
One lesson worth remembering is that a leak behind tile can cost far more than professional installation. Saving money on labor is not worthwhile if it creates hidden water damage.
Think About Water Efficiency and Energy Use
A shower head affects both water use and water heating costs. Using less hot water can reduce energy demand, especially in a busy household.
For example, replacing a 2.5 GPM shower head with a 2.0 GPM model can save water during each minute of use. The exact savings depend on shower length, household size, water temperature, and local utility rates.
WaterSense-labeled products are tested for efficiency and performance. They must meet requirements for water use, spray force, and coverage.
Still, a low-flow model is not automatically the best choice for every home. If the plumbing has weak pressure, a very restrictive fixture may feel disappointing. Balance efficiency with comfort and real water conditions.
Avoid These Common Buying Mistakes
Knowing how to choose a rain shower head also means knowing what to avoid.
• Buying by appearance alone. A stylish head may have poor coverage or weak flow.
• Choosing an oversized model for a small shower. It may splash outside the enclosure.
• Ignoring the GPM rating. A large head may need more water than your system can supply.
• Forgetting the shower arm. The existing arm may not extend far enough or support the weight.
• Skipping the warranty. Replacement parts can be difficult to find for unknown brands.
• Installing without checking the connection. Thread sizes and adapters vary.
• Expecting rain spray to feel like a pressure jet. Rainfall designs are usually softer by nature.
• Using harsh cleaners. Strong chemicals can damage finishes and silicone nozzles.
• Failing to check local rules. Plumbing and water-efficiency requirements may vary by state or city.
These mistakes are easy to prevent with a few measurements and a careful look at the product specifications.
A Simple Buying Checklist
Use this checklist before placing an order:
-
Measure the shower space.
-
Choose a size that fits the enclosure.
-
Check your water pressure and current flow.
-
Decide between ceiling and wall mounting.
-
Select a spray pattern that matches your routine.
-
Confirm the connection size and shower arm requirements.
-
Choose a durable material and suitable finish.
-
Look for easy-clean nozzles.
-
Check the GPM rating and efficiency certification.
-
Read the warranty and return policy.
-
Confirm that replacement parts are available.
-
Hire a professional for new ceiling or in-wall plumbing.
This process makes how to choose a rain shower head less confusing. It also shifts your focus from flashy features to comfort, fit, safety, and long-term value.
How to Choose a Rain Shower Head for Different Needs
Different households need different shower setups.
For a small bathroom
Choose a 6 to 8-inch head with a moderate flow rate. A wall-mounted arm is usually the simplest option.
For a large walk-in shower
A 10 to 16-inch head may provide better coverage. Make sure the water supply can support the larger spray area.
For low water pressure
Select a smaller head with well-designed nozzles. A combination rain and handheld system may offer more control than a very large overhead model.
For a family bathroom
Choose a durable finish, adjustable arm, and handheld wand. Easy-clean nozzles can save time when several people use the shower.
For an accessible bathroom
A handheld shower head, thermostatic valve, and adjustable slide bar may be more useful than a fixed rain shower alone. Follow local accessibility guidance and consider professional installation.
For a luxury bathroom
Focus on the full system rather than the head alone. A good valve, proper body sprays, balanced pressure, and strong waterproofing often matter more than a very large fixture.
Frequently Asked Questions About How to Choose a Rain Shower Head
What size rain shower head is best?
An 8 to 12-inch rain shower head works well for many standard bathrooms. Choose a smaller model for limited space or low pressure, and a larger model only when the shower area and plumbing can support it.
Does a rain shower head use more water?
It can use more water if it has a high flow rate or a large spray area. Check the GPM rating, and consider a WaterSense-labeled model for better water efficiency.
Is a ceiling-mounted rain shower head better than a wall-mounted model?
A ceiling-mounted model creates a more direct rainfall effect. A wall-mounted model is often easier and less expensive to install, so the better choice depends on your plumbing, layout, and budget.
Will a rain shower head work with low water pressure?
Some will, especially smaller models with efficient nozzle designs. A large rain shower head may feel weak when the water supply cannot deliver enough flow.
Are silicone nozzles worth choosing?
Yes, silicone nozzles are easy to wipe and can help reduce mineral buildup. They still need regular cleaning, especially in homes with hard water.
Can I install a rain shower head myself?
A simple wall-mounted replacement may be suitable for a careful do-it-yourself installation. New ceiling plumbing, hidden connections, or waterproofing work should usually be handled by a qualified plumber.
What is the best material for a rain shower head?
Stainless steel and brass are durable choices. ABS plastic can be affordable and lightweight, but quality varies, so check reviews, warranty terms, and replacement part support.
Conclusion
The best way to choose a rain shower head is to match the fixture to your space, water pressure, plumbing, and daily routine. Check the size, GPM rating, spray pattern, installation position, material, finish, cleaning needs, and warranty before you buy.
For many homes, an 8 to 12-inch wall-mounted model with easy-clean nozzles and a moderate flow rate offers a reliable balance. Measure first, read the specifications, and choose comfort over flashy extras. Explore trusted bathroom fixture options, compare the details, and share your own shower upgrade experience in the comments.