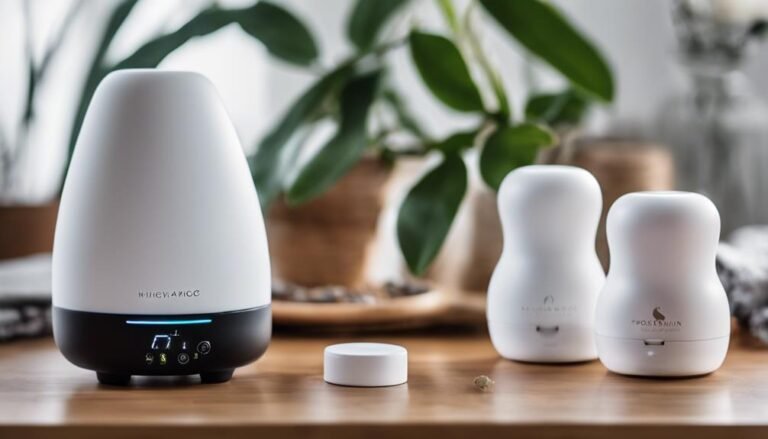
You can make a night light projector with an LED, a box, and simple cutout shapes.
Learning how to make a night light projector is a fun way to create soft stars, moons, or colorful patterns at home. This guide explains the optics, materials, steps, safety rules, and design tips so you can build a projector that looks good and works well.
How a Night Light Projector Works
A homemade night light projector uses a small light source to cast shapes onto a wall or ceiling. The light passes through holes, cutouts, or a clear pattern. The wall then acts like a large screen.
The basic design has four parts:
- A light source, such as a battery-powered LED
- A body or box to hold the parts
- A pattern, stencil, or perforated cover
- A clear path from the light to the wall
The effect is similar to a tiny theater. The LED is the lamp, the pattern is the slide, and the wall is the screen.
The size and sharpness of the image depend on the distance between the light, pattern, and wall. A small light source usually creates clearer shapes than a large glowing bulb.

Materials You Need
Before learning how to make a night light projector, gather safe and simple materials. Most items may already be in your home.
Basic materials
- A small cardboard box, clean food container, or paper cup
- A battery-powered LED tea light or small LED flashlight
- Black construction paper or thin cardboard
- White paper or tracing paper
- Scissors
- A pencil
- Tape or glue
- A ruler
- A dark room or dim space for testing
Optional materials
- A compass for drawing circles
- A craft knife for adult use
- Colored transparent plastic sheets
- Aluminum foil
- A small plastic dome
- Washable markers
- A smartphone flashlight
- A magnifying glass
Use an LED light rather than a candle or halogen bulb. LEDs produce much less heat and are a safer choice for a paper or cardboard project.
If children are helping, an adult should handle sharp tools. Keep small batteries away from young children and pets. Button batteries can be dangerous if swallowed.

How to Make a Night Light Projector Step by Step
This simple method creates a star projector with a cardboard box and an LED light. It is easy to adjust and works well for a bedroom, reading corner, or sleep space.
1. Prepare the projector body
Choose a small box with a lid. A box about 4 to 8 inches wide is a useful size for a first project.
Close the box and check that it is firm. If it has loose flaps, secure them with tape. The box should block most stray light so the pattern looks brighter on the wall.
2. Mark the pattern area
Use a pencil to mark one side of the box. This will become the projection face.
Draw small dots, stars, moons, or simple shapes. Leave space between each shape. If the holes are too close together, the light may blend into one large patch.
For a star effect, make holes in different sizes. Tiny holes create small points of light. Larger holes create brighter and wider spots.
3. Cut or pierce the shapes
Use a pencil tip, wooden skewer, or adult-handled craft tool to make the holes. Turn the box so the light will shine through the patterned side.
You can also draw shapes on black paper and cut them out. Tape the paper over an opening in the box. This method makes it easy to change the design later.
Try not to make every hole the same size. A mix of sizes gives the projection a more natural look.
4. Add the LED light
Place the LED tea light or small LED flashlight inside the box. Position it behind the pattern.
The light should not touch the cardboard for long periods, even if it feels cool. Leave a little space around it. If the flashlight has a narrow beam, point it toward the patterned wall.
Do not use a real candle. A cardboard projector can catch fire quickly when exposed to an open flame.
5. Close and test the box
Close the box and turn on the LED. Aim the patterned side at a light-colored wall or ceiling.
Start with the projector 3 to 6 feet from the wall. Move it closer for a smaller image or farther away for a larger image.
If the image looks faint, darken the room. If the shapes look blurry, adjust the light and pattern position.
6. Secure the parts
Once the design looks right, secure the LED with a small piece of tape or removable adhesive. Do not cover the battery compartment or power switch.
Make sure the box cannot fall onto a bed, pillow, curtain, or other soft material. Set it on a stable table or shelf.
This basic method shows how to make a night light projector without special electronics. It also gives you a simple base for more advanced designs.

Create a Jar or Plastic Dome Projector
A jar or dome design can spread light in more directions than a cardboard box. It also looks more decorative during the day.
For this version, use a clean plastic container, translucent bowl, or frosted jar. Avoid thin glass near children because it can break.
Cover the outside with small star stickers, black paper shapes, or washable paint. Leave some areas open so light can pass through.
Place a battery-powered LED inside or beneath the container. If the container is clear, place a sheet of tracing paper around the light. This softens harsh glare and makes the pattern smoother.
A useful lesson from hands-on craft projects is to test the material before finishing the design. Some plastic becomes cloudy, melts, or gives off an odor near heat. Always use a cool LED and stop using the projector if the container feels warm.

Make the Projection Brighter and Sharper
The most common problem with a homemade projector is a weak or blurry image. Small changes can improve the result.
Use a small light source
A point-like LED makes clearer shapes than a broad glowing lamp. A flashlight with a focused beam can work well, but it may create a bright center.
If the center is too bright, place a small sheet of tracing paper between the light and pattern. Test different distances until the image looks even.
Improve the pattern
Use dark, opaque material around the openings. Thin white paper may let unwanted light escape.
Keep the holes clean and smooth. Ragged cuts scatter light and make the edges less clear.
Simple shapes work best. Stars, circles, hearts, clouds, and planets are easier to project than detailed drawings.
Choose the right wall
A white or pale wall gives the clearest result. Textured walls may soften the edges. Dark paint can make the projection appear weak.
Close blinds and turn off nearby lamps. Even a small amount of room light can reduce contrast.
Adjust the distance
Moving the projector changes the image size. Moving it farther from the wall makes the image larger, but it may also make the pattern less bright.
For a bedroom, a smaller image often feels calmer. For a party or playroom, a larger pattern may be more exciting.

Add Color and Moving Effects
You can make how to make a night light projector more creative by adding color. Use transparent plastic, colored cellophane, or thin acetate behind selected openings.
Do not cover the LED with thick material. It can block too much light and may trap heat. Use small color pieces instead.
For a moving effect, place the box on a slow-turning display stand. You can also make a paper disk with several patterns and turn it by hand.
A simple rotating design can show stars, planets, and clouds in sequence. Keep moving parts away from loose hair, cords, and small children.
Avoid shining bright lights directly into anyone’s eyes. A night light should create a soft glow, not act like a laser or high-power spotlight.

Use a Smartphone Carefully
A smartphone flashlight can help you test a pattern before buying a light. Place the phone behind a paper stencil and aim it at a wall.
This method is useful for short tests, but it may not be ideal for overnight use. Phones can become warm, their batteries can drain, and the flashlight may not sit securely.
Never cover the phone’s vents or place it under blankets. Do not charge it inside a closed cardboard box.
For regular sleep use, a certified battery-powered LED night light is a better choice. It is simpler, cooler, and less likely to interrupt your sleep with notifications.

Safety Tips for a Homemade Night Light
Safety is the most important part of how to make a night light projector. A beautiful design is not worth using if it creates heat, glare, or a fire risk.
Follow these rules:
- Use LED lights only.
- Keep paper, fabric, and cardboard away from hot bulbs.
- Never use candles, matches, or open flames.
- Do not connect homemade wiring directly to a wall outlet.
- Use low-voltage battery packs with intact wires.
- Keep batteries away from children and pets.
- Check the projector for heat during the first 30 minutes.
- Stop using it if you notice melting, smoke, odor, or discoloration.
- Keep the projector away from curtains, bedding, and water.
- Do not place it where it can fall onto a sleeping child.
For a child’s room, place the projector out of reach. It should not have loose cords or removable small parts.
Electrical projects need extra care. If you want to add a switch, motor, or circuit, use a ready-made low-voltage kit and follow its instructions. Do not experiment with household electricity.
Common Problems and Easy Fixes
Many first attempts fail for simple reasons. The following fixes can save time.
The image is too dim
Darken the room first. Then check whether the pattern material is too thick or the LED is too far from the openings.
A brighter LED may help, but avoid using a high-heat bulb. A focused battery flashlight is often a safer upgrade.
The image is blurry
Move the pattern closer to the light or adjust the projector’s distance from the wall. Also check whether the holes have rough edges.
A tiny light source and a clean, flat pattern usually create sharper shapes.
The pattern is too large
Move the projector closer to the wall. You can also make smaller holes or use a smaller pattern sheet.
The projection has one bright spot
The LED may be too close to the pattern. Move it back slightly or add a thin diffuser made from tracing paper.
Do not press paper directly against a warm light.
The box leaks light
Cover gaps with black tape or extra cardboard. Light leaks reduce contrast and make the shapes harder to see.

Design Ideas for Different Ages
A homemade projector can suit many rooms and interests.
For babies, use soft, large shapes with slow movement. Avoid flashing lights, sharp glare, and small removable pieces. A simple moon and cloud design is often calmer than a busy star field.
For older children, try planets, dinosaurs, ocean animals, or a galaxy theme. Let them draw the shapes, while an adult handles cutting tools.
For teens and adults, use geometric patterns, constellations, or warm amber colors. A frosted dome can look stylish on a nightstand.
You can also create a seasonal projector with pumpkins, snowflakes, leaves, or hearts. Changing the stencil is often easier than building a new projector.
How to Make a Night Light Projector Last Longer
A homemade night light projector can last for months if you treat it like a small electrical device rather than a simple craft.
Use strong tape or removable fasteners. Replace batteries when the light begins to fade. Keep the box dry and store it away from heavy objects.
Dust can reduce brightness, so wipe the outside with a dry cloth. Do not spray cleaner near the LED or battery compartment.
Inspect the projector once a week if it stays in a child’s room. Look for loose parts, damaged wires, bent battery contacts, or signs of heat.
If the cardboard becomes soft or damaged, rebuild the body. Cardboard is cheap, and replacing it is safer than trying to repair a weak structure.
Frequently Asked Questions About How to Make a Night Light Projector
How to make a night light projector without a box?
Use a plastic dome, paper cup, or small container with holes or cutout shapes. Place a battery-powered LED behind or inside it, then aim the openings at a nearby wall.
What light is best for a homemade night light projector?
A cool, battery-powered LED is the best choice for most projects. It uses little power, produces limited heat, and works well with cardboard, paper, and plastic.
Can I use my phone to make a night light projector?
Yes, you can use a phone flashlight for a short test with a paper stencil. Do not cover the phone’s vents, place it under fabric, or leave it charging inside a closed box.
How to make a night light projector brighter?
Use a focused LED, reduce light leaks, and darken the room. You can also move the projector closer to the wall or use thinner, darker stencil material.
Is a homemade night light projector safe for children?
It can be safe when it uses a cool LED, has no loose small parts, and stays out of reach. An adult should cut materials and inspect the projector for heat or damage.
How far should a night light projector be from the wall?
Start at about 3 to 6 feet from the wall. Move it closer for a smaller, brighter image or farther away for a larger image.
Can I use a candle in a homemade projector?
No. A candle can ignite cardboard, paper, plastic, or fabric. Use a battery-powered LED instead.
Conclusion
Learning how to make a night light projector is simple when you use a cool LED, a sturdy body, and a clear pattern. A cardboard box offers the easiest start, while a jar or dome can create a softer decorative glow.
Test the light in a dark room, adjust the distance, and inspect the projector for heat before regular use. Start with a basic star pattern, then try colors, planets, seasonal shapes, or a slow rotating design.
Build your first projector this evening, share your favorite pattern, and explore more safe DIY lighting ideas for your home.