Introduction
To install weather stripping around a door, first check where air, light, water, or noise enters. Then clean the frame, measure each side, cut the material, and attach it so the closed door makes a light, even seal. Add a door sweep or bottom seal if the gap is under the door.
This guide applies to common doors in U.S. homes, including exterior entry doors, back doors, garage entry doors, and basement doors. It covers adhesive, compression, and kerf-in weather stripping. It does not replace the instructions for a fire-rated door or a manufacturer’s door system.
A good seal can reduce drafts and help keep dust, insects, and rain out. The U.S. Department of Energy recommends weatherstripping movable parts, such as doors and windows, while using caulk for fixed gaps.

What Weather Stripping Does
Weather stripping seals the moving joint between a door and its frame. When the door closes, the strip should compress or bend enough to block air without stopping the latch from working.
A door seal is not the same as caulk:
- Weather stripping seals the gap around a door that opens and closes.
- A door sweep seals the gap along the bottom edge.
- Caulk seals fixed cracks around trim, the frame, or the wall.
- A threshold is the raised piece below the door. Some thresholds can be adjusted to improve the seal.
Most door weather stripping has three parts:
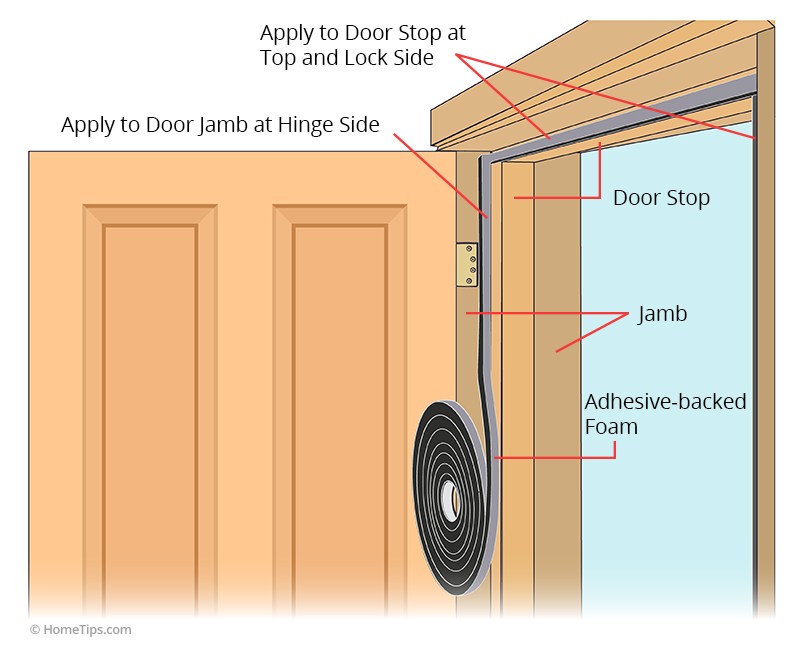
- Head seal: The strip across the top of the frame.
- Jamb seals: The strips on the hinge-side and latch-side frame.
- Bottom seal: A sweep, door shoe, or threshold seal below the door.
The best seal is usually snug, not tight. If the door needs force to close, the material may be too thick, the frame may be out of square, or the threshold may be too high.
The U.S. Department of Energy explains that weatherstripping should be placed around movable doors and windows. The [ENERGY STAR program](https://www.energystar.gov/saveathome/seal_insulate/identify-problems-you-want-fix) also lists weatherstripping and door sweeps as ways to reduce air leakage.

Choose the Right Type of Door Weather Stripping
Choose the seal based on the door and the size of the gap. A soft adhesive foam strip is quick to install, but a screwed-on rubber or vinyl seal usually handles more use.
| Type | Best use | Main benefit | Main limit |
|---|---|---|---|
| Adhesive foam | Small, even gaps on low-use doors | Easy to cut and apply | Can peel or wear sooner |
| Rubber or vinyl compression seal | Exterior entry doors | Strong seal and good durability | Needs a clean, firm mounting surface |
| Spring-metal seal | Older wood door frames | Slim and long-lasting when fitted well | Harder to cut and install |
| Kerf-in seal | Door frames with a narrow slot | Neat, replaceable fit | Requires a compatible kerf |
| Door sweep | Gap under the door | Blocks drafts, dust, and insects | May drag on floors |
| Door shoe or bottom seal | Exterior doors with a large bottom gap | Covers the door’s lower edge | May require door removal |
| Tubular rubber seal | Larger gaps around sturdy frames | Handles uneven contact | Can make the door hard to latch |
How to identify the existing seal
Look at the door frame with the door open:
- If the old strip is held by screws, remove it and use the same style or a compatible replacement.
- If the strip sits in a narrow groove, it is likely a kerf-in seal.
- If the strip has an adhesive backing, it is an adhesive seal.
- If the frame has no seal but has screw holes, use a screw-on compression seal.
- If the gap is mainly below the door, measure for a sweep rather than adding thick seals to the sides.
For a typical exterior door, a screw-on rubber or vinyl compression seal is often a better long-term choice than basic foam. For a rental or a lightly used interior door, adhesive foam may be enough.
Do not cover or change a fire-rated door assembly without checking the label, building rules, and manufacturer’s instructions. A door between a house and an attached garage may have fire-resistance requirements. The International Residential Code is adopted and changed by states and local jurisdictions, so local rules control.

Tools and Materials You Need
Gather the tools before removing the old seal. The exact list depends on the product.
Basic tools
- Tape measure
- Pencil
- Scissors or a sharp utility knife
- Screwdriver or drill
- Small pry tool
- Cleaning cloth
- Mild household cleaner
- Rubbing alcohol for suitable surfaces
- Sandpaper for rough wood, if needed
- Safety glasses
- Work gloves
Materials
- Weather stripping for the head and jambs
- Door sweep or bottom seal, if needed
- Replacement screws, if the old ones are damaged
- Exterior-grade primer or paint for bare wood, when needed
- Caulk for fixed cracks around the frame
Read the package before you buy. Check the material’s:
- Gap range
- Length
- Mounting method
- Temperature limits
- Surface requirements
- Compatibility with wood, metal, vinyl, or painted surfaces
Measure before shopping. For one door, the side seals need about twice the door height. The head seal needs about the door width. Buy a little extra so you can make clean cuts and avoid joining short pieces.
For example, a .Wrong? 80-inch door with a 36-inch-wide frame needs about 196 inches of seal before waste:
- Two sides: 80 + 80 = 160 inches
- Top: 36 inches
- Total: 196 inches
That is about 16 feet 4 inches. A longer roll gives you room for mistakes.
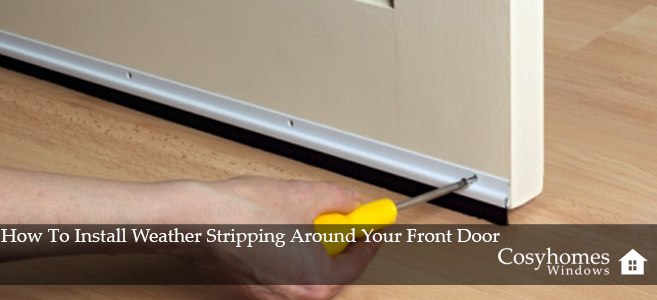
How to Install Weather Stripping Around a Door
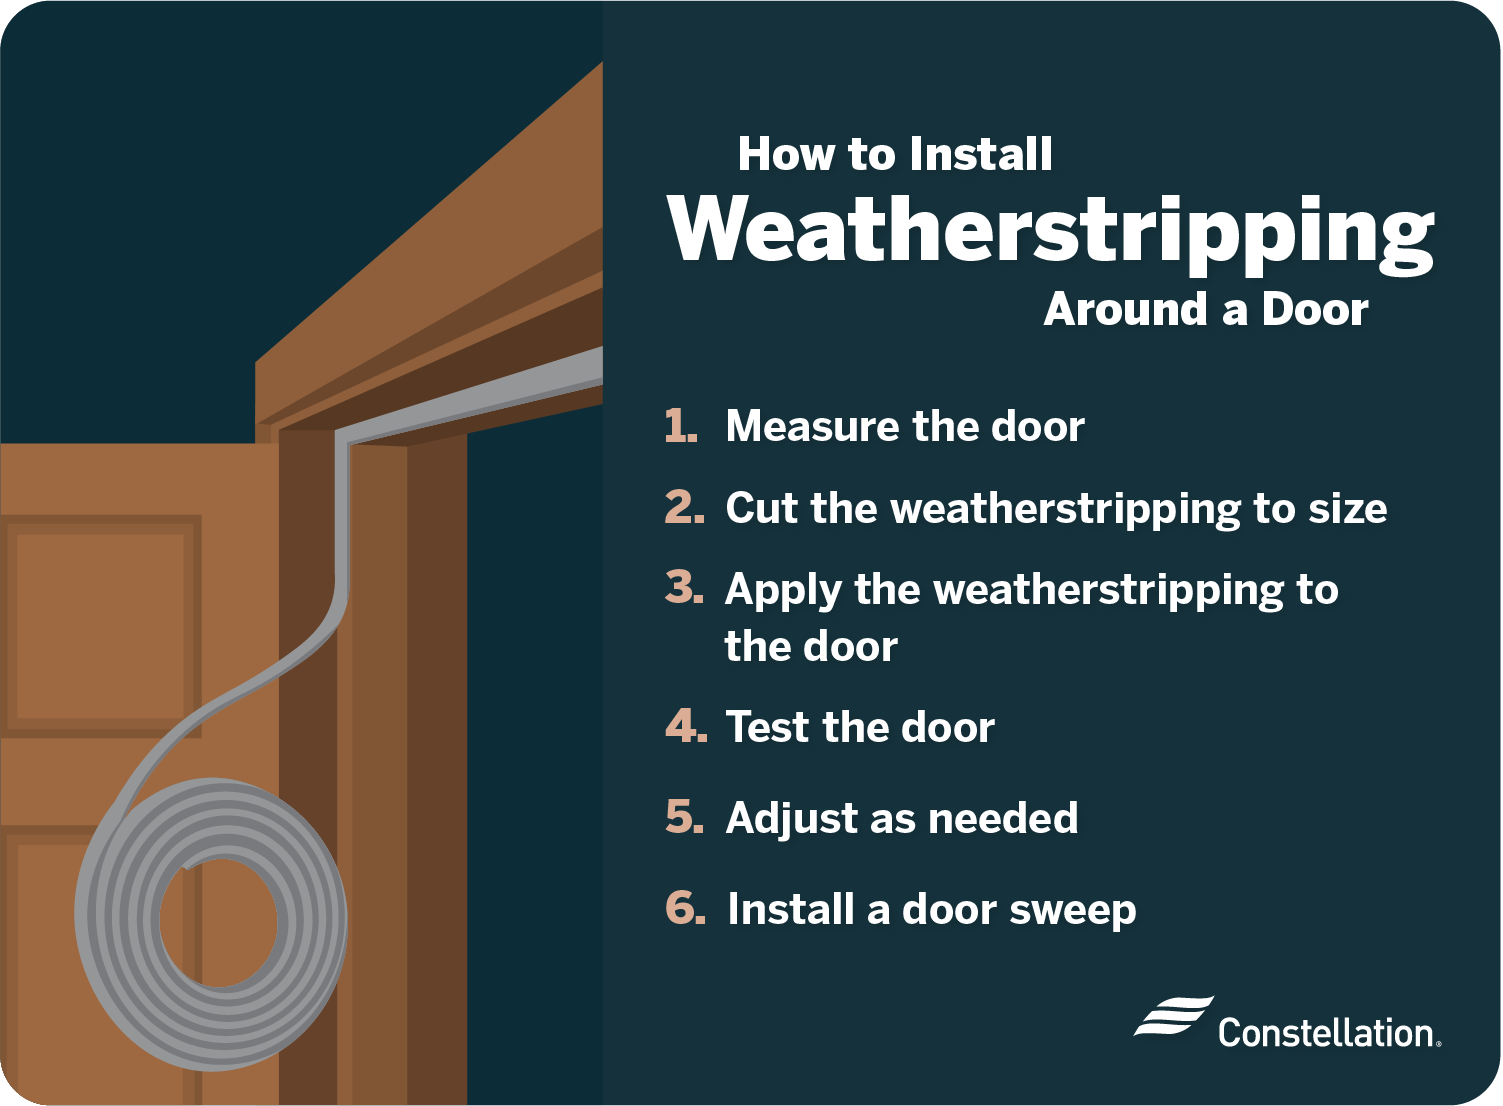
Install the top and side seals first. Add the bottom seal after you confirm that the door closes and latches with the new material in place.
1. Find the air leaks
Close the door and inspect the edges. Look for:
- Daylight around the frame
- A visible gap
- Loose or crushed weather stripping
- Water marks
- Dust trails
- Curtains or paper moving near the door
- A cold draft in winter
On a cool, windy day, hold a thin tissue near the closed door. Movement can help show where air enters. Do not use an open flame, candle, or lighter to find leaks. Combustible materials and household surfaces can catch fire.
Check the hinges and latch as well. A loose door can create a gap that new weather stripping will not fix.
2. Remove the old weather stripping
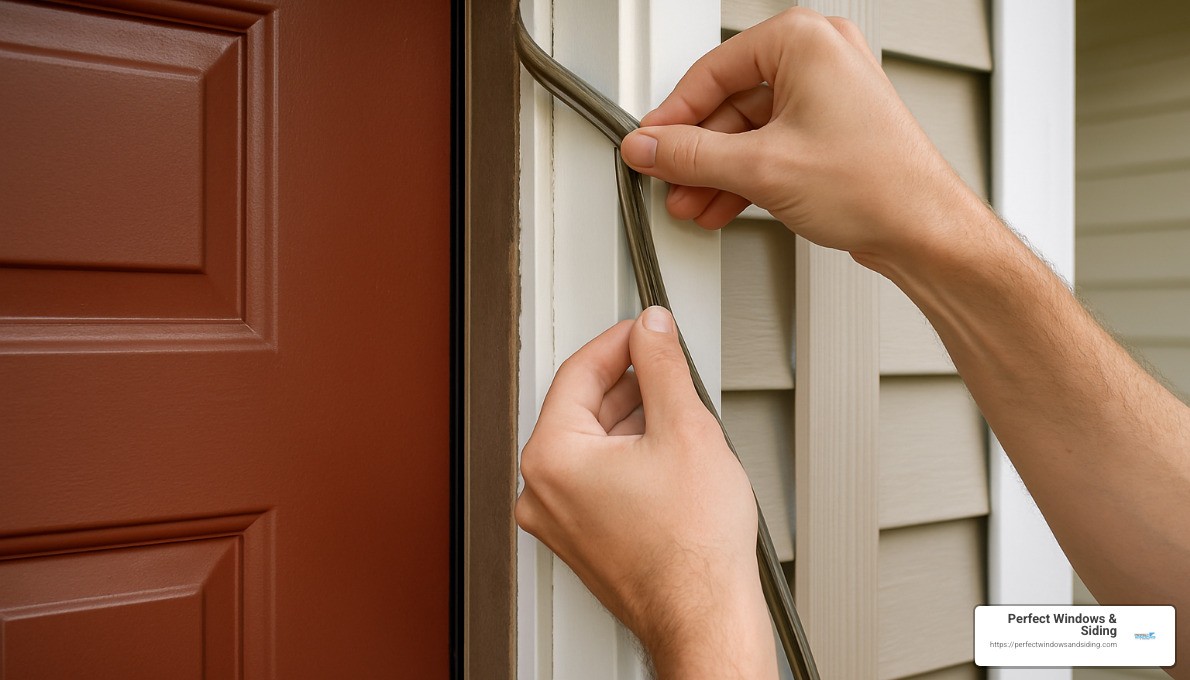
Open the door. Pull out adhesive foam by hand or use a plastic scraper. Remove screws from screw-on seals. For kerf-in seals, pull the strip from the groove.
Work slowly around painted wood. Aggressive scraping can remove paint or damage the frame. Remove leftover adhesive before installing the new seal.
If the old material contains unknown fibers, heavy dust, or damaged paint in an older home, stop and identify the material before disturbing it. Homes built before 1978 may contain lead-based paint. The EPA’s lead-safe renovation guidance explains precautions for work that disturbs painted surfaces.
3. Clean and inspect the frame
Clean the mounting area with mild cleaner and let it dry. For adhesive products, the surface must be free of dust, grease, and loose paint.
Inspect the frame:
- Tighten loose screws.
- Remove splinters.
- Sand rough wood lightly.
- Replace rotten wood before sealing.
- Repair a loose or badly damaged trim board.
- Check that the door closes squarely.
Do not install adhesive weather stripping over wet, peeling, dusty, or oily paint. Adhesive may stick at first and then fall off.
4. Measure each section
Measure the left jamb, right jamb, and head separately. Do not assume that both sides are the same length.
Measure the gap with the door closed. A strip should fill the gap when compressed, but it should not require excessive force. If the gap changes from top to bottom, a flexible seal may work better than rigid foam.
Use the product’s gap range as the deciding guide. A thick strip does not always make a better seal. If it is too thick, the door may spring open, fail to latch, or rub against the frame.
5. Cut the top and side pieces
Cut each piece to length with square ends. For a clean fit, the top piece usually meets the side pieces at the upper corners.
Some products call for mitered corners. Follow the package directions rather than guessing. Keep the compression bulb or flexible edge facing the door so it contacts the door when closed.
Leave no large break at the corners. Small gaps can leak air and water.
6. Install screw-on weather stripping
For a screw-on seal:
- Hold the strip against the frame with the flexible edge touching the closed door.
- Start with one screw near the middle.
- Check that the door closes without excessive force.
- Add the remaining screws.
- Space screws as the product instructions require.
- Avoid over-tightening, which can distort the strip.
- Trim or cap the ends as directed.
Install the hinge-side seal first if the door is difficult to hold in position. Then fit the latch side and top.
Keep screws short enough to avoid damaging wiring, plumbing, or other hidden materials. In a normal door frame, use the supplied fasteners or the size recommended by the seal maker.
7. Install adhesive weather stripping
For an adhesive seal:
- Test-fit the strip with the paper backing still on.
- Cut the piece to length.
- Peel back a short section of backing.
- Press the strip into place from one end to the other.
- Keep steady pressure along the full length.
- Do not stretch the material.
- Press the corners firmly.
- Wait for the adhesive to set for the time listed on the package.
Do not pull the foam tight while applying it. Stretching can make the strip shrink later and leave an open gap.
Adhesive seals work best on clean, smooth, dry surfaces. They may fail on rough brick, loose paint, damp wood, or very cold surfaces.
8. Install the door sweep or bottom seal
A sweep is needed when the gap under the door lets in air, light, insects, or water.
With the door closed, check whether the bottom edge is even with the threshold. Choose a sweep that fits the door thickness and gap.
For a surface-mounted sweep:
- Measure the door width.
- Mark the sweep.
- Cut it to fit.
- Hold it against the inside face of the door.
- Position the flexible edge so it lightly touches the threshold.
- Mark the screw holes.
- Drill small pilot holes if the instructions call for them.
- Fasten the sweep.
- Open and close the door several times.
The sweep should touch the threshold lightly. If it bends sharply, drags, or prevents the latch from engaging, raise it or use a thinner model.
For a door shoe or bottom seal, you may need to remove the door. Use two people for a heavy exterior door. Support the door before removing hinge pins, and follow the product instructions.
9. Test the completed seal
Close and latch the door. Check the full perimeter.
A successful installation should have:
- No visible daylight
- Even contact around the frame
- A working latch
- No need to slam the door
- No strong draft
- No sweep that drags hard
- No crushed or folded seal
Use a strip of paper to test contact. Close the door on the paper at several points. The paper should pull out with some resistance. If it slides out freely, the seal may not contact the door. If it tears or will not move, the seal may be too tight.
Wait through one or two weather changes before judging the seal. Some materials soften or settle after installation.

What to Do If the Door Will Not Close
If the door will not close after weather stripping is installed, remove pressure before adding more material. A tight seal can hide a door alignment problem and damage the latch.
Check these causes in order:
- The strip is too thick. Replace it with a thinner seal or one rated for the actual gap.
- The strip is in the wrong position. Move it so the door contacts the flexible edge, not the rigid mounting base.
- The frame is uneven. A thick seal may work on one part and bind on another.
- The door is sagging. Tighten hinge screws and check alignment.
- The threshold is too high. Adjust it only if the threshold design allows adjustment.
- The sweep is too low. Raise it until it touches the threshold without heavy drag.
- The latch or strike is misaligned. Correct the alignment rather than forcing the door.
If the door closes but pops open, the compression seal may be overfilled. If the latch only catches when you push hard, the seal may be too thick or the door may be out of square.
If the door rubs before the seal touches, inspect the hinges and frame. Do not keep tightening screws into damaged wood. A carpenter or door professional may be needed when the frame has rot, movement, or major sag.

Common Installation Mistakes
Avoid these errors because they reduce the seal’s life or create a new door problem.
Using caulk on a moving joint
Caulk is not a substitute for weather stripping around a door that opens. It can crack, stick, or prevent movement. Use caulk only on fixed gaps.
Installing the seal on the wrong surface
Some seals belong on the frame. Others belong on the door. Follow the product diagram. A seal placed on the wrong plane may fold instead of compressing.
Stretching adhesive foam
Stretching changes the material’s size and can create gaps at the ends. Press it into place without pulling.
Covering a wet or dirty frame
Adhesive needs a clean, dry surface. Dirt and moisture can cause early failure.
Sealing the bottom but ignoring the threshold
A sweep cannot correct a badly worn, cracked, or low threshold. Replace or repair the threshold when it is the main source of leakage.
Blocking drainage paths
Exterior doors may use weep holes or drainage channels. Do not cover them with sealant or install a part that traps water inside the frame.
Adding too much material
More foam is not always better. An oversized seal can keep the door from latching and may put stress on hinges and the frame.
Ignoring the door between a home and garage
That door may be part of a required fire separation. Do not remove, drill, or modify it without checking the door label, manufacturer’s instructions, and local code requirements.
Weather Stripping vs. Caulk: Which One Do You Need?
Use weather stripping when the gap is between the moving door and its frame. Use caulk when the gap is fixed.
| Problem | Better repair |
|---|---|
| Draft between the closed door and jamb | Weather stripping |
| Draft under the door | Door sweep or threshold repair |
| Crack between trim and wall | Caulk |
| Crack between the frame and rough opening | Backer material and suitable sealant |
| Loose or rotten frame | Repair or replacement before sealing |
| Water entering at a sill | Threshold, pan, flashing, or drainage repair |
A draft around the frame may come from more than one source. Seal the moving joint first, then inspect the trim and wall joint. If water enters during rain, do not rely on weather stripping alone. Find the water path, because trapped moisture can damage the frame and wall.
How Often Should You Replace Door Weather Stripping?
Inspect door seals at least once a year and after severe weather. Replace them when they are cracked, brittle, loose, permanently flattened, or no longer touch the door.
A seal may also need replacement when:
- The adhesive has lifted.
- The rubber has split.
- The door has become drafty.
- The sweep has worn through.
- The material stays crushed after the door opens.
- Water or insects pass around the closed door.
Clean the seal with mild soap and water unless the manufacturer gives different instructions. Avoid harsh solvents that can damage rubber, vinyl, paint, or adhesive.
The correct replacement may be different from the first seal you installed. Seasonal movement, a new threshold, or a repaired frame can change the gap.
Key Takeaways
- Check the gap before buying a seal.
- Use weather stripping on the sides and top of the door.
- Use a sweep or bottom seal under the door.
- Clean and dry the frame before installation.
- Do not stretch adhesive foam.
- The closed door should latch without force.
- Do not alter a fire-rated door without checking its requirements.
- Use caulk only for fixed cracks.
- Repair rot, sagging, or water damage before sealing.
Frequently Asked Questions
Can I install weather stripping without removing the door?
Yes. Most adhesive and screw-on seals attach to the frame while the door remains hung. A door shoe or some bottom seals may require door removal.
Should weather stripping go on the door or the frame?
Follow the product instructions. Many compression seals attach to the frame, while some door sweeps attach to the door. The seal must contact the opposite surface when the door closes.
How do I seal a large gap around an exterior door?
First check whether the door or frame is misaligned. For a sound door, use a seal rated for the measured gap. If the gap is very large or uneven, repair the frame or threshold instead of stacking several strips.
Why does my door still have a draft after weather stripping?
The draft may come from the bottom, threshold, trim, wall joint, or a poorly aligned door. Test each edge separately. A new strip cannot fix a rotten frame, a sagging door, or an open crack around the rough opening.
Can weather stripping stop rain from entering?
It can help stop water that passes through the closed door gap. It cannot fix poor flashing, a damaged threshold, blocked drainage, or water entering above the door. Investigate the full water path.
Is adhesive foam good for an exterior door?
It can work on a clean, smooth frame with a small, even gap. A screw-on rubber, vinyl, or kerf-in seal is often more suitable for a frequently used exterior door, but the gap and frame condition should guide the choice.
Conclusion
Installing weather stripping around a door is mainly a matter of finding the leak, choosing a seal that fits the gap, and fitting it without making the door hard to close. Start with the head and jambs, then address the bottom with a sweep or threshold repair.
After installation, check the latch, paper resistance, daylight, and drafts. If the seal fails, look for alignment, moisture, rot, or a gap that is too large for the chosen material.